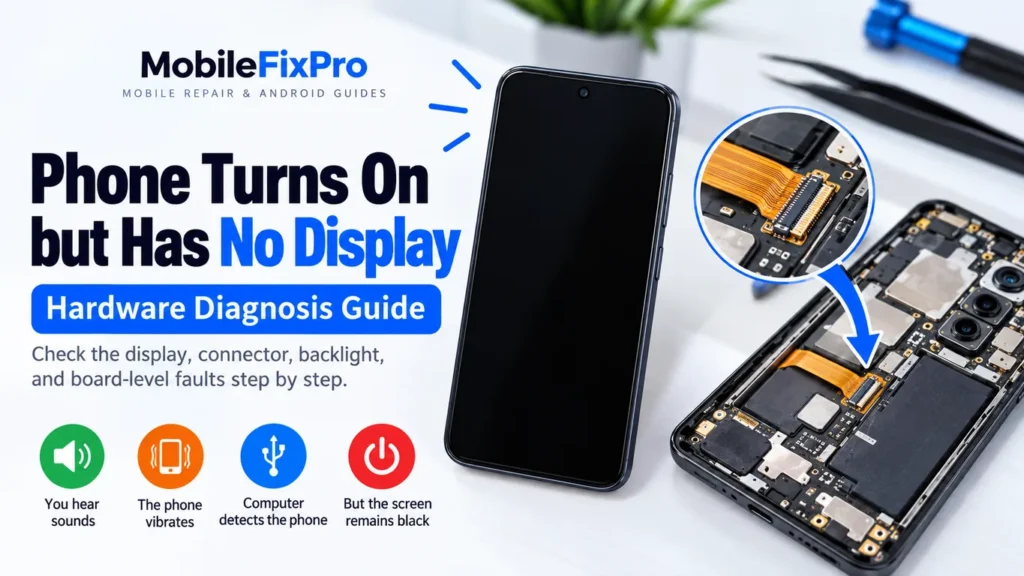
A phone can appear to power on normally while showing a completely black screen. You may hear notification sounds, feel vibration, hear startup audio, or see the device detected by a computer, yet the display remains blank.
This does not automatically mean the motherboard is dead.
A no-display fault can originate from the display assembly, display connector, flex cable, backlight circuit, display power supply, damaged board circuitry, or—depending on the phone—software or firmware problems.
The most useful approach is to work from simple, low-risk checks toward more advanced diagnosis rather than immediately replacing components or attempting board-level repairs.
Important: The exact display circuit, connector arrangement, test points, voltages and board design vary between phone models and board revisions. Use the manufacturer’s or appropriate model-specific service documentation before performing board-level measurements or repairs.
Symptoms That Indicate the Phone May Still Be Running
Before opening the phone, establish whether the device is actually operating.
Useful signs include:
| Symptom | What it may indicate |
|---|---|
| Phone vibrates when powered on | Main system may be booting |
| Notification sounds are heard | Android may be running |
| Computer detects the phone | USB/system functions may still operate |
| Calls reach the phone | Cellular/system functions may be active |
| Screen remains completely black | Display path requires investigation |
| Image is visible under strong light | Possible backlight-related problem on LCD-based designs |
| Cracked or physically damaged display | Display assembly becomes a strong suspect |
| Display works intermittently | Connector, flex, panel or board connection may require investigation |
These observations are diagnostic clues, not proof of a particular failed component.
1. Possible Causes of a No-Display Fault
A black screen can have several causes.
Display assembly failure
The LCD or OLED panel itself may be damaged even when the rest of the phone continues operating.
Physical damage is not always obvious. A display can fail because of internal panel damage, pressure, liquid exposure, flex damage or an electrical fault.
Loose or damaged display connector
A connector that is not properly seated can interrupt communication or power between the motherboard and display assembly.
This is particularly worth investigating after:
- a screen replacement
- a phone drop
- housing/frame replacement
- previous repair work
- liquid exposure
Damaged display flex cable
The display flex may be torn, folded, contaminated or damaged around its connector.
A phone that works intermittently after movement can justify closer inspection of the flex and connector.
Display power or circuit fault
The motherboard supplies the display with the electrical signals and power required for operation. A fault in that path can leave a known-good display without an image.
The exact circuit depends heavily on the device design.
Backlight fault
On LCD-based phones, the image may exist without the backlight operating.
This can produce a screen that appears black even though image information is being generated.
Do not assume this applies to OLED/AMOLED displays. Their construction and illumination method are different.
Liquid or corrosion damage
Liquid exposure can affect connectors, flex cables and board circuitry.
Corrosion may continue causing problems even after the phone appears dry.
Software or firmware problem
Not every black screen is hardware-related.
A device can sometimes experience boot, firmware or display-driver problems. Software troubleshooting should therefore be considered before concluding that a board component has failed.
Learn More iPhone Screen Repair: Common Problems and Solutions
2. Start With Safe External Checks
Do not immediately disassemble the phone.
First determine whether the phone responds normally.
Check 1: Force restart
Use the correct force-restart procedure for the specific model.
Because button combinations differ between manufacturers and models, verify the procedure for the device rather than applying a generic combination.
Check 2: Listen and feel for activity
After attempting to start the phone, check for:
- vibration
- notification sounds
- charging sounds
- incoming-call response
- alarm activity
These clues can help establish whether the phone is operating behind the black display.
Check 3: Connect a charger
Observe whether the phone responds to charging.
Charging behavior alone does not prove that the phone has successfully booted, but it provides another diagnostic clue.
Check 4: Test USB detection
If appropriate, connect the phone to a computer.
A device appearing through USB can indicate that some system functions are operating even though the display is unavailable.
However, USB detection alone does not prove that the display circuit is healthy.
3. Look for a Faint Image
This test is particularly useful for LCD-based phones.
In a dark environment, power the phone on and illuminate the screen with a strong flashlight from an angle.
Look carefully for:
- lock-screen graphics
- notification icons
- boot logos
- faint text
- other image information
If a faint image is visible
The phone may be generating an image while the illumination system is not functioning.
That makes the backlight circuit or related display hardware worth investigating.
If absolutely no image is visible
The problem could involve:
- display panel
- display connector
- display flex
- display power
- display communication
- motherboard circuitry
- software/firmware
This test is not a definitive diagnosis.
4. Test With a Known-Good Display
For technicians, one of the most useful diagnostic steps is testing the device with a compatible known-good display assembly.
The replacement must actually be compatible with the specific model and revision.
Do not assume that a physically similar display is electrically compatible.
Diagnostic logic
Known-good display works →
The original display assembly becomes the primary suspect.
Known-good display also remains black →
Investigate the connector, display power, communication path and motherboard.
Both displays work intermittently →
Inspect the connector, flex routing, mechanical pressure and board connection carefully.
This is usually more informative than replacing random components.
5. Inspect the Display Connector
If opening the phone is appropriate and you have the necessary repair equipment, disconnect the battery according to the device’s service procedure before handling internal connectors where applicable.
Inspect the display connector under suitable lighting and magnification.
Look for:
- contamination
- bent contacts
- damaged connector housing
- missing components near the connector
- torn flex cable
- corrosion
- signs of previous repair
- debris preventing proper seating
Do not scrape connector contacts aggressively.
A connector can be damaged by excessive force, making a relatively simple repair significantly more complicated.
6. Check the Display Flex
Follow the display flex from the panel to the motherboard.
Look for:
- sharp folds
- tears
- punctures
- crushed sections
- separation around the connector
- liquid contamination
- signs of overheating
Pay particular attention to areas where the flex passes through the frame.
A display can fail after a repair if the flex has been trapped or compressed during reassembly.
7. Check the Battery and Power Condition
A phone that appears to turn on may not necessarily have stable power.
Before performing board-level display diagnosis, verify that the battery is adequately charged and that the device is not repeatedly shutting down during startup.
A very low or damaged battery can create misleading symptoms.
If the phone has suffered liquid exposure, swelling, overheating or unusual battery behavior, stop and address the battery safety issue before continuing.
8. Board-Level Diagnosis
Board-level diagnosis should only be performed when basic checks have narrowed the fault sufficiently.
Typical diagnostic areas can include:
Display connector → display power circuitry → display communication path → related components → motherboard
However, there is no universal voltage, resistance or diode-mode value that can safely be copied from one phone to another.
Do not guess test values
For a specific model, obtain appropriate board-level documentation before measuring:
- display supply rails
- connector lines
- continuity
- diode-mode readings
- component behavior
Marking a value as “normal” without model-specific documentation can lead to incorrect diagnosis.
9. A Practical Diagnosis Decision Tree
PHONE POWERS ON
       │
       ▼
Does it show signs of operation?
       │
   ┌───┴───┐
   NO      YES
   │        │
   ▼        ▼
Check      Black display
power/     remains?
charging       │
              ▼
       External checks
              │
              ▼
       Faint image visible?
          │          │
         YES         NO
          │           │
          ▼           ▼
   Investigate       Test known-good
   LCD/backlight     compatible display
                       │
                 ┌─────┴─────┐
                WORKS       STILL BLACK
                  │              │
                  ▼              ▼
             Original       Connector/flex/
             display        power/board diagnosis
             suspect
This decision tree is intentionally general because the actual display architecture varies between devices.
10. Common Mistakes During Diagnosis
Replacing the screen immediately
A screen replacement can solve the problem, but it is not always the cause.
Better approach: establish whether the phone is operating and, where possible, test with a known-good compatible assembly.
Assuming a black screen means a dead motherboard
A functioning phone can have a completely failed display.
Better approach: separate the display problem from the main-system problem using observable symptoms.
Measuring random voltages
Different models use different display architectures and power requirements.
Better approach: use model-specific technical documentation.
Reconnecting components with the battery connected
This can create unnecessary electrical risk depending on the device and connector design.
Better approach: follow the device-specific service procedure.
Ignoring previous repair history
If the phone stopped displaying after a screen replacement, frame repair or housing change, the previous repair is important diagnostic evidence.
Applying heat without diagnosis
Heat can damage displays, flex cables, adhesives and nearby components.
Better approach: identify the failed section before applying any repair method.
11. When the Fault Is Likely Beyond a Basic Screen Replacement
Professional board-level diagnosis becomes more appropriate when:
- a known-good compatible display also fails
- the display connector is damaged
- liquid corrosion is present
- the phone suffered significant impact
- display circuitry appears damaged
- the device has a history of previous board repair
- the fault is intermittent and difficult to reproduce
- model-specific measurements indicate an abnormal display circuit
At this point, continuing to replace parts without diagnosis can increase repair costs and introduce additional faults.
12. Testing After Repair
After replacing or repairing the suspected component, test more than whether the screen lights up.
Check:
- image quality
- brightness
- touch response
- display uniformity
- proximity-sensor behavior where relevant
- front-camera operation where the display assembly includes related components
- automatic brightness where applicable
- charging
- restart behavior
- sleep/wake operation
The exact features to test depend on the phone model and display assembly.
Troubleshooting Table
| Symptom | Initial area to investigate |
|---|---|
| Phone vibrates but screen is black | Display assembly and display connection |
| Faint image visible on LCD | Backlight-related circuit |
| Screen works after reconnecting | Connector/flex seating or connection |
| New compatible display also black | Connector, display power/path or board |
| Display failed immediately after repair | Flex, connector, installation damage |
| Liquid exposure followed by no display | Corrosion and affected circuitry |
| Phone repeatedly restarts | Power/software/system diagnosis as well as display |
| Computer detects phone but screen remains black | Phone may be operating despite display failure |
These are starting points rather than definitive diagnoses.
Technical Safety
Before opening a phone:
- Disconnect external power where appropriate.
- Follow the model-specific service procedure.
- Handle lithium-ion batteries carefully.
- Do not puncture, bend or crush a battery.
- Avoid shorting battery contacts.
- Use appropriate ESD precautions.
- Do not apply heat without understanding the component and procedure.
- Use model-specific documentation for board-level measurements.
- Stop if the battery is swollen, damaged or unusually hot.
For board repair, never rely on generic voltage or resistance values from another phone model.
When to Seek Professional Repair
A professional repair technician is appropriate when the phone has:
- liquid damage
- a damaged motherboard
- a damaged display connector
- suspected display power-circuit failure
- burned or missing board components
- a swollen or damaged battery
- an unknown short
- a recurring display fault after screen replacement
Board-level repairs can require microscopes, controlled soldering equipment, measurement equipment and model-specific documentation.
Technical Disclaimer
Repair disclaimer: Smartphone construction, display technology, connectors and board revisions vary between models. The procedures above are general diagnostic guidance and should not replace model-specific service documentation. Battery, electrical and board-level repairs can cause injury or permanent device damage if performed incorrectly. Use appropriate safety and ESD procedures and seek qualified repair assistance when necessary.


Join the Conversation
Have a question or insight to share? Add your thoughts below.